Team and account settings
The Developer Console has two settings screens: Team Settings, which holds everything about the team itself, and Profile Settings, which holds your own account.
Team settings
Every member of a team can open Team Settings, but only Admins see the legal name and payout setup on it. The attribution link and the agreement status are visible to everyone.
Legal name
The company or individual legal name your team's agreements are signed under. Use your registered legal name, or your full personal name if you are not incorporated.
Platform agreements
Jest requires two agreements: the Game Development and Publishing Agreement and the Acceptable Use Policy. Team Settings carries the text of each, the version in force, and whether your team has signed it, along with who signed and when.
Until the required agreements are signed, the console shows a warning banner and blocks the steps that put work in front of users: submitting an app for review, and activating a new build for an app that is already published. A first build for an app that has never been published is not held up. The banner also warns that payouts are locked. Click Review Team Agreements in that banner to sign. Jest asks for your legal name first, then records each agreement against it. Only an admin can sign.
Agreements are versioned. When Jest publishes a new version, it returns to Pending and needs signing again.
Payout setup
Bank details for your earnings, collected by Stripe. See set up payouts.
User acquisition link
Your team's attribution link credits incoming users to your team. The credit is recorded when someone who arrived through the link registers, or when a user who had gone inactive comes back through it — a visit alone is not an acquisition. Users credited to you count toward your team's acquisition revenue — your share of what they spend anywhere on the platform, not only in your own apps — and appear under User activity on the Earnings page.
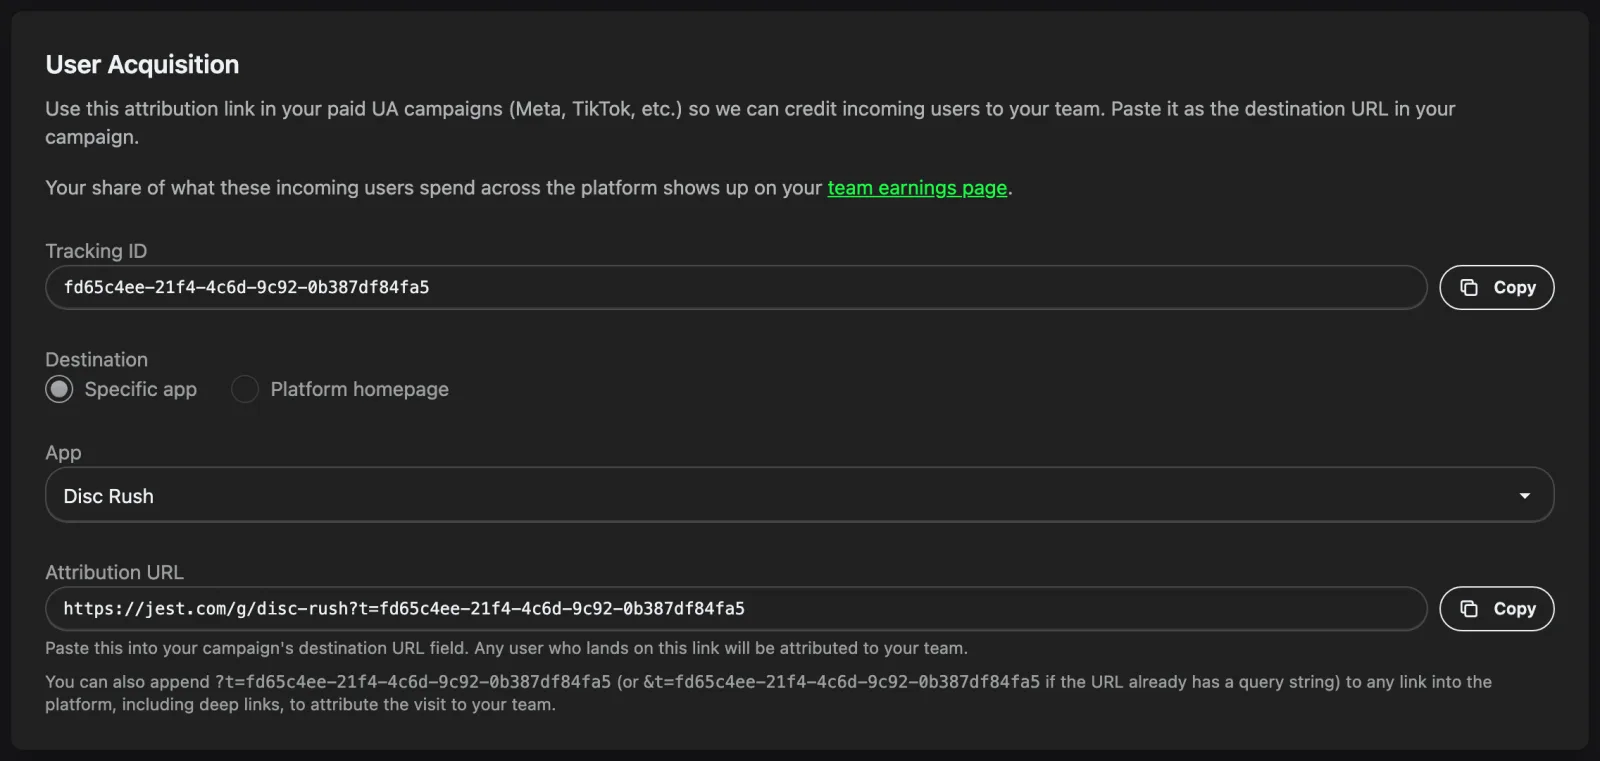
Your team has a tracking ID, and Jest builds the link around it. Pick where it should land:
- Specific app — the link opens one of your apps:
https://jest.com/g/your-app?t=<tracking-id>. - Platform homepage — the link opens Jest itself:
https://jest.com/?t=<tracking-id>.
Copy the Attribution URL into the destination URL field of your campaign, on Meta, TikTok, or wherever you buy. The user acquisition guide covers how Jest picks the acquiring team, including the 24-hour attribution window and adding UTM parameters alongside t.
You can also attribute a link you built yourself by appending ?t=<tracking-id> to it, or &t=<tracking-id> if it already has a query string. This works on any link into the platform, including deep links.
Your account
Profile Settings, under User in the left-hand navigation, covers your own account rather than any team. Your email address is the one you sign in with and is shown read-only.
Subscription Preferences controls which emails Jest sends you. Each one is a separate toggle:
| What it covers | |
|---|---|
| Review updates | Submission confirmations and review decisions for your apps. |
| Builds & assets | Build processing results and asset moderation outcomes. |
| User feedback digest | A summary of user bug reports and feedback, for apps with the digest turned on. |
| Account & platform | Account activity and general platform updates. |
| Marketing updates | Product updates, feature announcements, and developer newsletters. |
These are per person, not per team: turning one off stops it for you only.