Manage apps
The Developer Console allows you to create and manage your Jest apps.
After creating an app, you can control how it appears on the platform, upload and manage builds, configure in-app products, manage images, and access analytics and security credentials.
Create an app
To create a new app:
- Open the Jest Developer Console and log in.
- Select Apps from the left-hand navigation and click Create New App.
- Enter an App Name and an App Slug. The slug determines your app’s URL:
https://jest.com/g/<app-slug>. Slugs are stored lowercase, and the URL works with any capitalization. The app slug cannot be changed after creation. - (Optional) Provide additional properties:
- Description – A short summary of your app.
- Card Color – The color of your app card in the Explore and Home sections.
- Set the Visibility:
- Hidden – The app is not visible to users.
- Unlisted – The app opens from a direct link and stays in users' libraries, recents, and notifications, but never appears in Explore or recommendations.
- Public – The app can appear anywhere on the platform, including Explore.
- Click Create App.
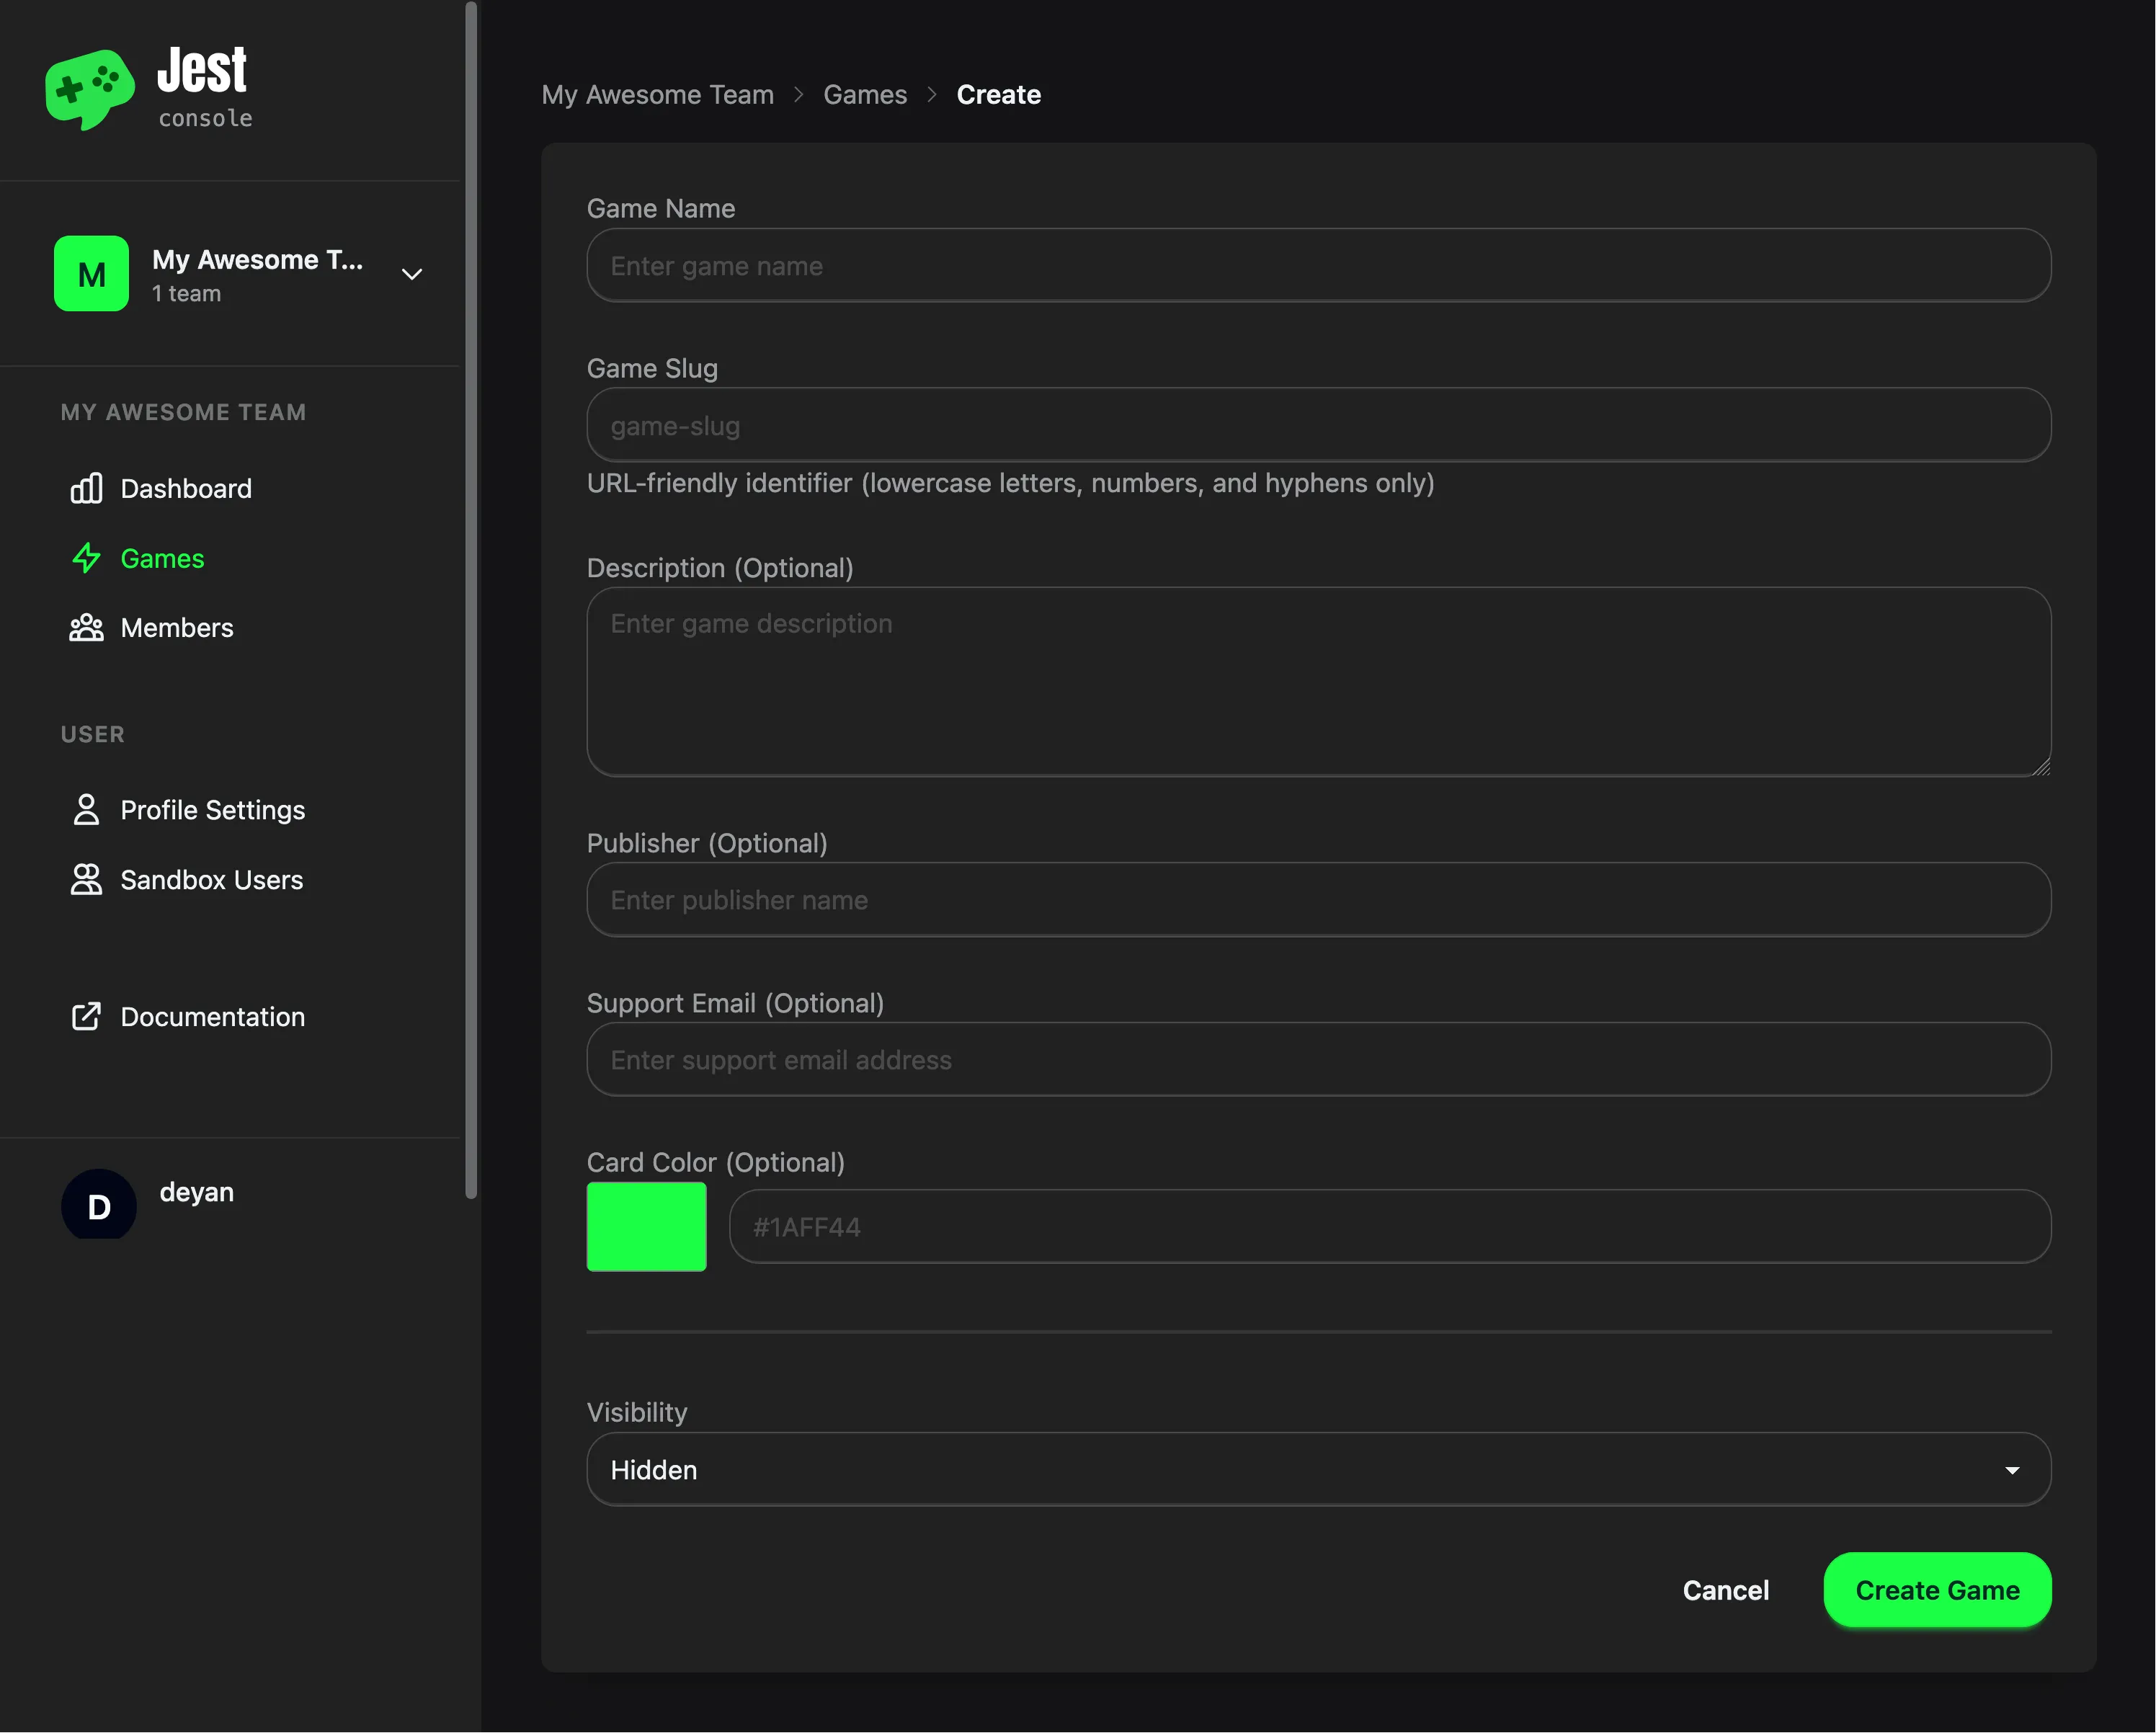
Create App screen in the Jest Developer Console
Configuring app properties
You can edit your app’s properties at any time from the Overview tab.
These properties determine how your app appears across the Jest platform. Providing clear descriptions, consistent branding, and strong visuals helps present your app professionally, improves discoverability, and builds trust with users.
Available properties include:
- App name
- Description – A short summary of your app. It appears on your app's card in Explore, and in the Recommended for you row on the Home tab.
- Logo – A square image that represents your app across the platform.
- Hero image – A 4:5 image that represents your app, shown on those same Explore and Recommended for you cards.
- Hero video (optional) – A short video. When supplied, it plays in place of the hero image on those same surfaces, falling back to the hero image if the video cannot play.
- Category – The category your app is listed under.
- Keywords – Comma-separated terms used for discovery and search.
- Support email – The address that receives user support requests for your app. See Support email below.
- Loading Screen Mode – Controls the loading overlay shown when users enter your app:
- Auto (default) – A brief loading animation is shown and automatically dismissed.
- Manual – The overlay is shown automatically but your app controls the progress and dismissal via the SDK. See the Loading Screen SDK documentation for integration details.
- Off – No loading overlay is shown.
- Supported Orientation – Declares whether your app plays in portrait, landscape, or both. See Supported orientation below.
Supported orientation
Jest supports both portrait and landscape apps. Use the Supported Orientation setting to declare which screen orientations your app opens in, so the platform can prompt users to rotate their device when needed.
To change it, open your app's Overview tab, click Edit, and select a value under Gameplay:
- Both – Your app adapts to either orientation. Users are never prompted to rotate. New apps default to Both; apps created before this setting existed default to Portrait.
- Portrait – Your app plays in portrait. Users holding their device in landscape see a rotation prompt.
- Landscape – Your app plays in landscape. Users holding their device in portrait see a rotation prompt.
Apps set to Landscape are also offered fullscreen on Android, and while a user is in fullscreen the platform locks the screen orientation to the one you declared, where the browser supports it.
This setting tells the platform what your build expects — it does not rotate or rescale your app. Your build still needs to render correctly at the orientation you declare.
Support email
A support email is required when publishing an app. Users can contact your studio by tapping Contact Support on the app info popup, which opens their mail client with a message pre-addressed to this address.
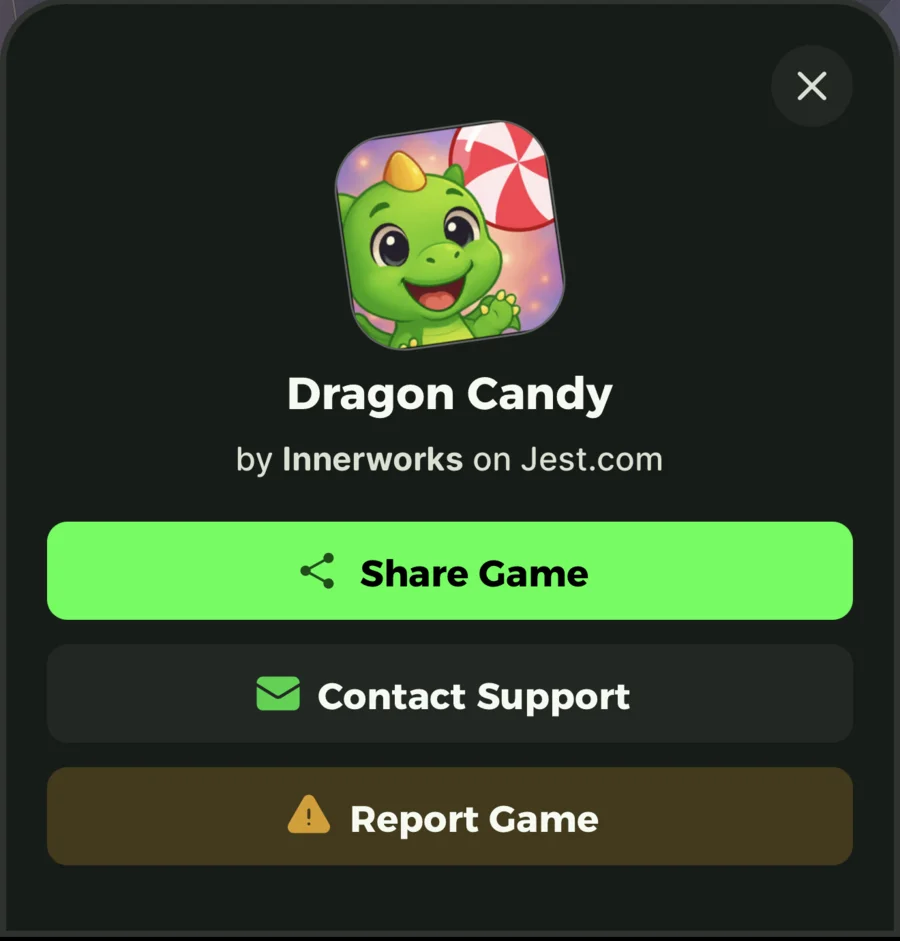
The Contact Support action on the app info popup
The subject line is pre-populated with the app name and the user's ID for your app, for example:
Support Request - Dragon Candy (Ref: c0fe0ac8-5e2b-418d-abd3-d87a316d9328)
The value after Ref: is the user's playerId for your app. Paste it into the User Lookup tab to inspect that user's current app state when responding to the request.
Submit an app for review
Before your app can go live on Jest, it must be submitted for review and approved.
Before you submit
Your app needs:
- At least one build uploaded and activated in the Versions tab.
- A logo and a hero image.
- A support email.
- The Game Development and Publishing Agreement and the Acceptable Use Policy signed by your team, under Team settings.
The Submit for Review button is disabled until the build, the images and the signed documents are in place - hover it to see which are missing. A missing support email does not disable it; that one is caught when you click.
These get you into the Simulator. Submitting from there also requires the automated Basic Launch checks to pass, which the Simulator runs. The Basic Launch requirements a reviewer assesses by hand are judged after you submit.
Submit for review
- Open your app in the Developer Console.
- Select Manage → Edit App.
- Scroll to the bottom of the page.
- Select Submit for Review.
This saves your changes and opens the Simulator's submission flow for the build selected in your draft. Play through your app, pass the applicable automated Basic Launch checks, and submit a self-review with SDK activity, notes, and an optional recording. See Submit a self-review for the walkthrough.
Once submitted, the app status changes to In Review.
While your app is in review
You can only have one submission in review at a time, and you cannot change which build your app runs until the review finishes.
To put a different build in front of the reviewer, open the Versions tab, select Use in pending submission on that build, and submit again from the Simulator. The action there becomes Update pending submission and replaces what is pending, so there is no need to withdraw first.
To stop the review instead, select Withdraw from Review on the Overview tab. That returns the submission to a draft you can edit and submit again.
Review outcome
Expect to hear from us within a few business days.
- Approved - your app goes live on the Jest platform.
- Rejected - your app remains unpublished, and a reason for the decision is provided.
An app is discoverable on the Jest platform only when it is both approved and marked as Public. An approved Unlisted app is usable by anyone with its link and keeps showing up for users who have already used it, but it is left out of Explore, recommendations, and the sitemap. If your app is approved but still set to Hidden, it will not appear on the platform at all.
Either way, open the Review tab to see what the reviewer found. See Review and moderation for what that includes and what happens next.
Updating a live app
After your app has been approved and is live, future updates - new builds and app property changes - go out without waiting for another review.
Events
The Events tab provides visibility into moderation actions and runtime errors related to your app.
This section helps you diagnose issues that may affect notifications or user-facing behavior.
Moderation
The Moderation view lists notifications that were blocked due to content policy violations.
A common example is user-supplied text (such as a username) that does not comply with Jest's acceptable use policy. If a notification includes non-compliant content, it may be prevented from being delivered.
Use this section to:
- Identify blocked notifications
- Understand why they were blocked
- Adjust your content or validation logic accordingly
Errors
The Errors view lists error-related events for your app.
Errors may appear at the notification level when validating the assetReference parameter. Possible error types include:
- The provided reference does not exist.
- The referenced image has not passed review.
- The referenced image has been archived.
Review these errors to diagnose issues preventing notifications from being scheduled successfully.
Secrets
The Secrets tab provides access to your app’s credentials:
- Shared Secret – Used to authenticate your app server with the Jest API and verify requests. You can regenerate this value if needed.
- Upload Token – Used to upload builds programmatically via the upload API.
Keep these credentials secure and never expose them in client-side code.
User lookup
The User Lookup tab lets you look up an individual user's state by their user ID. This is useful for customer support, allowing you to inspect a user's current app data when troubleshooting issues.
To look up a user:
- Navigate to Apps > Tools > User Lookup.
- Enter the user's User ID (UUID).
- Click Look Up.
If the user exists for this app, their details and full app state JSON are displayed. You can copy the JSON to your clipboard for further analysis.
Access to this tab requires at least a Viewer role on the app's team.
Analytics
Analytics covers how your app is performing with users.
Pick one chart at a time. Each covers the last 30 days. The five daily charts plot a day with no activity as zero rather than skipping it, though Retention shows a dash rather than a percentage for a day nobody started on; Trial Conversion is aggregated by week and leaves out weeks with no trial activity. Download CSV exports whatever the chart is showing.
| Chart | What it plots |
|---|---|
| Daily Active Users | Users who opened your app each day, split into registered and not registered. |
| New Users | Users who registered on Jest through your app each day. |
| Retention | One cohort per day, with its size and the share that came back on each of days 0 to 7. |
| Subscription Counts | Active subscriptions and trials, each counted per day. |
| Paying Users | Unique payers each day and the revenue per payer, from purchases and subscription payments. Total revenue is in the CSV rather than on the chart. |
| Trial Conversion | Trials that converted to paid against trials that churned, by week. |
These come from the platform's own event pipeline, so they measure what Jest observes — app opens, registrations, purchases — not your app's internal state. Money figures here are gross, for comparison with the Financials tab rather than with your earnings.
Financials
Financials shows what your app sold. Amounts are what users paid; your team's share of them, after payment and platform fees, is on the team Earnings page.
Product sales and subscription payments are totalled over the last 7 days, 30 days, and all time. Only completed transactions that carried revenue count, which leaves out trial signups, payments still processing, and anything a sandbox user bought — sandbox purchases are charged at zero, so they never carry any.
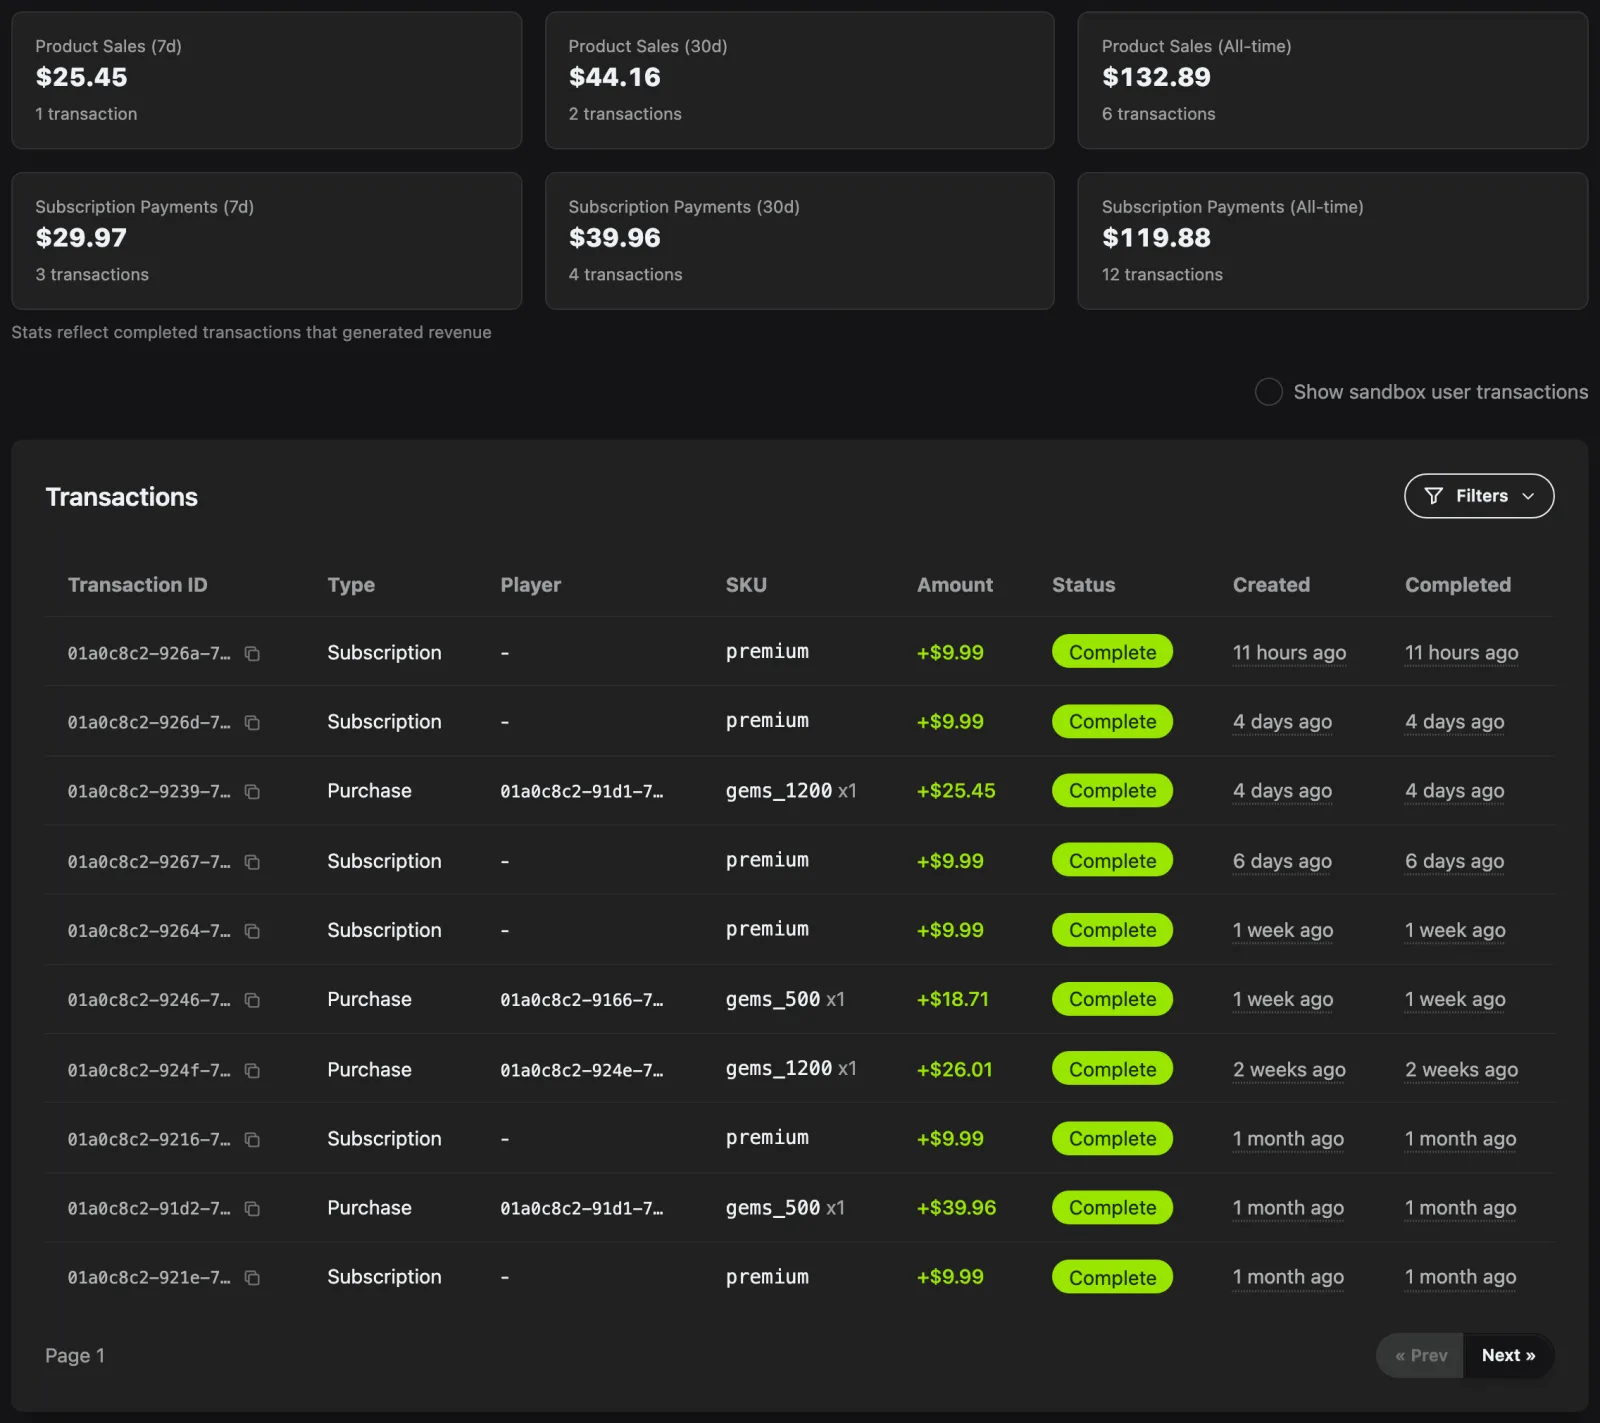
- Transactions — every purchase, subscription payment, and refund, with the user, SKU, amount and status. Filter by type and by status; trial signups are hidden by default, since they charge nothing.
- Subscriptions — the subscriptions currently in force: active ones, plus cancelled ones still inside a period the user has paid for. A cancelled subscription drops off once that period ends, so this is a current view rather than a history. Filter to trialing or paid.
Both lists hide sandbox activity until you ask for it.
Every member of the team can see this, down to Viewer.